Archive | for veggies RSS feed for this section

Recipe: Tortilla Espanola

7 Mar

Tortilla Espanola is a Spanish tapa (bar snack). It’s made with potatoes, onion, olive oil, and egg and is CRAZY delicious. It’s relatively easy to cook, but the execution can be tricky. You see, you cook the whole mess in a frying pan and then you have to finagle it out by flipping it onto a plate. I think I’ve FINALLY mastered the technique but I have definitely destroyed a few in my day. But, as Julia Child said, if you’re alone in the kitchen, WHO’S GOING TO KNOW? No one, that’s who. So it rips in half. You’re cutting that bitch into slices anyway. Nom.

6-7 medium sized potatoes

5-6 eggs

1 medium-large onion

Lots of olive oil

salt and pepper

Cut the potato and the onion in half lengthwise and then slice thinly. The slices will be in half-moon shapes.

Mix the potatoes and onion together in a bowl and salt liberally. Heat olive oil in a frying pan and add the onions and potatoes. You want enough olive oil to barely cover the veggies-maybe 1/2 a cup? Fry the vegetables until the potatoes are tender, but make sure they don’t burn. You’ll know they are ready when you can break a potato in half with a spatula.

Crack the eggs into a large bowl and whisk them together. Pour the potatoes and onions into the egg and mix. Add a tablespoon more oil to the frying pan and then pour the potato-onion-egg mix into it and spread it evenly around.

Allow to cook until the edges of the egg are slightly browned. The egg will still be runny, but the bottom will be cooked.

Now you can do one of two things to cook the other side. If you have a frying pan that is oven safe, turn the oven to 350 and cook the tortilla for 10 minutes to set the top. You still have to brown the top, though, so you’re going to need to flip the tortilla.

Grab a large plate and put it on top of the frying pan. Put your hand firmly on the plate and quickly flip the pan over so that the tortilla ends up on the plate. Put the frying pan back on the stove with a little more olive oil and allow to heat for a few seconds, then slip the tortilla back into the frying pan and brown for 2-3 minutes.

If you don’t have an oven safe frying pan, you’re going to have to flip the tortilla without the time in the oven first. This will work it just might be a smidge bit more messy. It’s ok though. It will be delicious either way!

When you’ve browned the other side, slip the tortilla onto a plate and cut into wedges.

Serve.

Yum yum yum.

❤ stef

How To: Creme Fraiche.

30 May

Alrighty. Creme fraiche. So it turns out creme fraiche is ridiculously easy to make. All you need is some heavy cream, culture, and a warm-ish windowsill. Emphasis on the warm-ish windowsill. I made this stuff in early May and Boston was still dealing with some shitty weather, so although I left my jar out for almost two and a half days the creme fraiche did not thicken correctly. I ended up sticking it in the fridge and then leaving it out for again for about an hour when the sun finally showed up, and it thickened almost immediately. Bacteria yay?

It is very fun to make. Very. It doesn’t involve much active process, but you feel triumphant anyway. Like an ass-kicking pioneer woman who is about to blow your bloody MIND.

1 container heavy cream

1 TB buttermilk or 2 TB yogurt – I used yogurt

jar

This picture makes me believe that the cream is ready to conquer the WORLD.

So. Pour all of your cream into a jar and add the buttermilk or yogurt. I used 2TB of greek yogurt. I had read that the cultures in yogurt aren’t as “strong” as the ones in buttermilk so I doubled the recommended amount. The yogurt you use will impart a slight flavor to your finished creme fraiche. For example, I used a tart greek yogurt and my creme fraiche was likewise slightly tart.

Stir in the yogurt/buttermilk and leave it (preferably uncovered, unless you’re worried about bugs) at room temperature for 24-48 hours. Keep in mind that it will continue to thicken slightly once you move it to the fridge.

I left it out longer (2.5 days).  On a warm day I would probably leave it for 12 and then check on it to ensure that it is thickening correctly, but you likely won’t need to leave it out for so long. Mine, even after 2.5 days, was initially very thin. I then left it out in the sun for maybe an hour and it thickened right up.

This is how it looked after 2.5 days.

As you can see, it wasn’t coagulating correctly. It still tasted good, it just didn’t quite have the texture I was after. If you end up with runny creme fraiche, remember that you can always whip it like whipped cream if you wish. I was actually planning on doing that until the sun finally showed up.

You can use the finished product in so many ways, just be sure to use it up in a week-ish. (I’m a little lax with expiration dates…I basically use something until it starts to smell.) (TMI?) Things I made:

Scrambled eggs

Pancakes

Creme fraiche/nutella strawberry dipping sauce (you just swirl the two together).

Enjoy!

❤ stef

How-To: Hard Boiled Eggs

13 Mar

Oh, hard boiled egg. You are a mysterious beast.

I never know when you’ve become successfully hard-boiled. It’s not like I can crack you open to check. Do you like to hide your secrets from me, egg? Hm?

That’s not very neighborly.

Fortunately, I have found a way to DEFEAT you! Muahaha!

The secret lies in bringing the water to a boil then turning off the heat and allowing you to slowly cook in the heated water.

Yummy yum yum.

You can be used in all manner of ways, hard boiled egg. I can turn you into deviled eggs, or egg salad, in meatloaf, plain with salt and pepper, as ramen garnish, with toast for breakfast…the list goes on.

Today I think I’ll turn you into egg salad.

Hooray egg salad!

Hard Boiled Egg/Egg Salad

Cover your eggs with cold water. Bring the water to a boil, then shut off the heat and cover. Let sit for 15 minutes. Rinse with cold water and peel off the shells. You may need to let them sit longer if your eggs are huge or you are hard boiling a very large quantity, but I always let them sit for 15 minutes and they always turn out great.

Egg Salad

Roughly chop up your eggs. Add about 1TB mayo, 1 tsp mustard, 1TB chopped pickle, 1/2-1 tsp assorted herbs (I like dill and thyme), sprinkle of paprika, salt and pepper, teensy bit of pickle or lemon juice, maybe some capers.

Mash about until it looks good. Taste and add salt if you think it needs. I like my egg salad with tomato if I have it, but I didn’t. I ate it with cabbage and some havarti cheese. However you eat it, spread on some bread or crackers and enjoy!


❤ stef

Recipe: Pepper Cheese Ball

21 Nov

I am a vair vair bad food blogger. Keeping up with posting really shouldn’t be as difficult as I make it. I cook EVERY day. Yesterday I made some nom-tastic eggplant parm, without a recipe (which I’m still sort of amazed I can do). Today I’ll probably make some butternut squash soup. I should take pictures, but I probably won’t start until it’s dark and then the pics will be crap (I prefer to use natural light) and I’ll be annoyed. To be perfectly honest, I’m probably only getting around to posting today because I have a paper due tomorrow and I am diligently procrastinating. La de da!

A few years ago my friend Nisi got me a copy of I Like You by Amy Sedaris. It’s one of the most perfect gifts I’ve ever been given. I heart Amy Sedaris, and I heart cooking, and I heart weird humor. Perfecto. There are many different recipes in this book and lots of different ideas for party themes and for party food. (Not to mention a recipe contributed by Stephen Colbert! Squee!) One of the items that is usually always included in a party menu is a cheese ball. First reading the book, I’d never seen a homemade cheese ball before. It was one of those weird retro items I’d only seen strangely prepackaged and sad looking, like fruitcake, and it had never occurred to me that a cheese ball could actually be good. You probably know why. You’ve seen the shrink wrapped monstrosities sold in supermarket deli departments and lurking in holiday gift baskets.

I decided to try making one for a New Year’s Eve party at a friend’s house, and the lucky cheese ball was Cluster Haven’s Pepper Mill Cheese Ball, chosen because of a friend’s nut allergy. I didn’t want him to be denied the cheese-y delicious. All went exceptionally well, and hey, turns out cheese balls are AMAZING. Since then (NYE 2006) I’ve made the same cheese ball for almost every party I’m invited to. Once I bring it that first time, people request it! Basically, you want to make this cheese ball. It makes you popular and everyone wants you at their parties. In fact, I am doing myself a great disservice by giving you the recipe at all, but it’s a risk I’m willing to take. Because I Like You.

Cluster Haven’s Pepper Mill Cheese Ball

1 stick of butter

1 8 oz package of cream cheese

1.5 C grated cheddar cheese (though really, you could use anything)

2 T grated onion (I usually use 1 tsp onion powder and 1/2 tsp garlic powder)

2 T coarsely ground pepper

The pics in this post are of a cheese ball I made for a Halloween party, so I tried to make it scary. He’s supposed to be some sort of Cthulhu/Octopus hybrid. Mostly he just looks cute. If you want to give you cheese ball a face like I did here, you need some pimiento olives and some carrot shavings.

Make sure your butter and cream cheese are at room temperature, or you’re going to hate your life.

Combine the butter and cream cheese.

Add the grated cheese and the onion (and garlic, if using). Mix thoroughly.

Pop the whole mess back into the fridge to firm up a bit, maybe 20-30 minutes, then take it out and form into a ball. The original recipe says to roll it in the pepper, but that’s never worked exceptionally well for me because I always end up with one side coated in pepper and the other bare. I’ve started just using my regular pepper mill and cracking pepper on one side of the ball, turning, cracking some more, until the whole thing is coated. It really helps if you have someone help you with this, but I live alone and I usually manage so I have faith in you.

Awwww!

If you want to give your cheese ball a face, use two whole pimiento olives for eyes (I used a teeny knife to make two hollows before I inserted the olives) and three olives for the tentacle things. Cut three olives in half and use three halves for each side of the cheese ball. Then, use carrot shavings for the nose and mouth.

I think he looks hilarious in the fridge.

Serve at room temperature with crackers.

❤ stef

How To: Pumpkin Puree

4 Oct

Alright ladies and gents. It’s that time of year again, the time when most Americans begin to experience uncomfortably desperate pumpkin cravings. You know who you are. You’re the one in the corner mainlining pumpkin spice lattes. Don’t try to hide! YOU’VE BEEN SPOTTED.

Ahem.

Sugar pie pumpkins and all manner of squash are currently on sale at Whole Foods for 99 cents a pound, which is what made me want to buy one. That and “sugar pie” pumpkin is such a cute name. Don’t you want to go buy one now? Sure you do. Go ahead. I’ll wait.

I’ve never actually been a fan of pumpkin pie (one of the only pumpkin incarnations I am aware of, I’ll admit) and I’ve recently decided that this might be because my grandma uses canned pumpkin. I know, I know, apparently there are really awesome and good quality canned pumpkin products out there, but this is just my THEORY. I really want to like pumpkin pie. I feel like I might be missing out on something.  In any case, making your own puree is really easy, and if you get the pumpkin on sale it is SO CHEAP. My pumpkin cost me about $1.50. You’re welcome.

The first step is to grab your pumpkin. Hello pumpkin! He is a sugar pie pumpkin, one of the smaller, sweeter varieties best for dessert making, and he weighs approximately 1.5 pounds. Aww.

Now, wash him. Cut off his stem and then cut him into quarters. This is his better half.

Use a spoon to scoop out all of his insides-seeds and stringy pulpy bits. Put it all aside because you can use the seeds for roasting, or making pumpkin brittle.

Put the quarters on a baking sheet, cover with foil, and roast in a 400˚ oven for 35-40 minutes.

My pumpkin has battle scars.

When it’s done, the pumpkin should be soft enough for you to scrape the shell off with a spoon. I left mine for 35 minutes and it was perfect.

Allow the pumpkin to cool for 10-20 minutes, then take a spoon and scrape the shell off.

Using some sort of mixing or mashing device, puree your pumpkin! I used my very favorite immersion blender that I use for everything. You might prefer a cuisinart, or a fork. I just don’t know.

The puree will keep for a few days in the fridge. I am still trying to decide what to so with mine. Right now, I’m thinking either pumpkin cheesecake or pumpkin pavlovas. I’ll decide in the next few days and post the results next Monday. In the meantime, happy pumpkin making!

❤ stef

Recipe: Fiddleheads, Fiddleheads (Pasta…)

6 Jun

Oh, the fiddlehead. What a strange little veggie. I had literally never seen them until a few weeks ago when I walked into Whole Foods and they were situated right in front of the produce section. I thought they were very cool looking, and the sign said that they tasted like asparagus. Plus, they were LOCAL! Hooray! I bought about 1/2lb ish.

I read a few articles about how best to prepare and cook them. I don’t usually have to do this but these little buggers are baffling. Plus the Whole Foods sign had warned about them being slightly poisonous if eaten raw, and I didn’t want to take any chances.

At least one of the articles said to trim the outer stem up to the coil, and then to cook them it was recommended that you steam them first, then stir fry in butter or olive oil and herbs, garlic, what have you.

Trim. If your fiddleheads have long handle-like stems, cut them to just where they begin to tightly coil. Discard the stems.

Rinse the coils with some water, because they can have little particle bits caught in them.

Steam them using a veggie steamer if you have one. If you don’t, that’s ok. You can just put them in a frying pan with a very little bit of water-let the water boil then put in the fiddleheads and cover with a lid. If you’re using a veggie steamer, fill a pot with an inch or two of water, put your fiddleheads in the steamer basket, put the steamer basket in the pot and set the pot at medium-high and cover.

Veggie steamer! So Sci-fi.

I steamed them for about 10-12 minutes, and I think that was too long. I would go for 7.

I made them into pasta, and it was quite delicious. If you want to go this route, have some water boiling for pasta. Boil whatever kind of pasta you like according to the package directions, but shave 2-3 minutes off of the cooking time.

When the fiddleheads are done steaming, put them in a big frying pan with about 2 TB olive oil, 1-2 tsp garlic, some parsley, about 1tsp lemon, and salt to taste. Stir fry them around for a minute or so, then add the cooked pasta and 1C chicken broth (or veggie broth if you want to keep it vegetarian-friendly). Keep it on medium-high heat and cook until the broth has reduced to about 1/2-1 inch.

Serve with lots of parmesean cheese and pepper.

Yummy yum yum!

❤ Stef

Recipe: Cheesy Stuffed Acorn Squash

20 Dec

I know I talk about this all the time and you probably want me to shut up, but I’m a recent west coast transplant.
In California, we get produce all year round. It’s awesome. The local variety changes, so in the winter we get lots of root veggies and greens, but the produce is there so eating local is easy. In Massachusetts it’s a little harder! I recently moved next to a Whole Foods, and they make it really easy for you to see where all of their produce comes from, ie, they label it with country/state of origin, and if it is local they tell you the city or farm/co-op if applicable. I love it. So the point is, nearly all of the veggies, even the winter ones, are from California.
And yes I’M from California but I think eating local is so important,  so for the last few weeks I’ve been eating squash and turnips, the only veggies I could find that are from Massachusetts. Adventure! Danger!
Surprisingly, turnips are really good! I bought a variety that claims to be a variant grown only in Massachusetts, and they were super-cheap and super-delicious. Who knew?
But the subject of this blog is squash. Specifically, acorn squash.
I don’t normally cook with winter squash (summer squash is totally different. I LURVE summer squash). It’s a curious vegetable, hard skinned and tender fleshed, I associate it either with soup or with overly sweet baked dishes. In fact, most of the recipes I found when looking for acorn squash inspiration involved sugar or maple syrup. I understand that this is a popular way of cooking squash, but I don’t usually like sweet-savory main dishes. I don’t eat turkey with cranberry sauce either. It’s weird.
So the recipe I decided to use has you baking the squash, and then stuffing it with cheesy orzo. Um, YUM. It’s like mac and cheese for grown ups! With veggies! SCORE.

Chessy Orzo Stuffed Acorn Squash (recipe from epicurious.com)

I halved this recipe because there is only one of me.

1 acorn squash, halved and seeded

1/2 C orzo pasta

1/2 C milk

1/4 C veggie broth (I used chicken. Just used whatever you have).

1/4 C parmesean cheese

(The original recipe calls for a combo of 1/4C sharp cheddar and 1TB parm, but I didn’t have cheddar. Feel free to make it any way you wish).

Cracked black pepper.

Preheat your oven to 400˚. Then ready your squash for the baking by cutting it in half (please don’t cut off your fingers.) and scooping out all of the seeds.

Now you are going to bake these guys by placing them cut sides down in a baking dish. Add about 1/3C of water to the baking dish and cover it with foil. Bake in the oven for 20 minutes.

Take the squash out of the oven, discard the water, and turn right side up. Sprinkle with salt and pepper. Keep the oven on.

Now you’re going to make the orzo! Bring a small pot (like 3 C of water) to boil and add the orzo. Let boil for 5 minutes and drain. Add the milk and broth to the orzo and bring back to a boil. You want the liquid to thicken up and the orzo to become tender, which should take 5 ish minutes. Remove from the heat and add the cheese, whichever you’ve decided to use, and the cracked pepper. Add salt to taste. Stir until everything is melty and combined.

Now you’re going to stuff the squash, muahaha! Divide the cheesy orzo into the squash halves and sprinkle with some more parmesean.

Bake at 400˚ (you should have just left the oven alone) for 12 minutes. Remove.

Serve!

Very satisfying.

❤ Stef

Recipe: Eggplant Parmesan

29 Sep

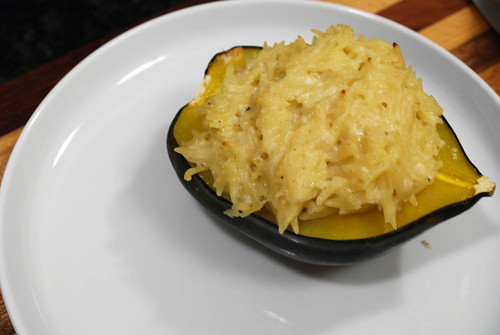
Eggplant parmesan is a dish that is a little involved, but by no means difficult. You have to batter and fry the eggplant (I’ve tried skipping this step, and let me tell you from experience that it is there for a reason; you NEED it!) before you layer the dish (like lasagna) which is why it takes longer to make. If you have an extra hour for dinner, though, it is totally worth it. I made marinara from scratch (see my previous post about the Great Tomato Invasion of ’09) but you could just as easily use canned tomatoes, or a jar of pre-made sauce.

You’re basically getting two recipes for the price of one in this post, because I’m going to give you my recipe for marinara sauce. Marinara is a critical component-too little and the whole dish is too dry, but you don’t want too much either or you end up with more of an eggplant sauce than an eggplant parmesan.

In short, do not be afraid of multi-step dishes! They are easy, I swear it. Make this for your Mom the next time she comes over for dinner. She will be so impressed that not only can you cook, but that you eat your veggies. Mothers love that shit.

Eggplant Bit.

1 medium to large eggplant (see picture below)

1 C (ish) breadcrumbs

1 C flour

2-3 eggs

2-4 C of cheese, mozzarella, jack, provolone, one or all three. Whatever you have or prefer.

1-2 C Parmesan

This is an eggplant.

Cut your eggplant into 1/2″ (ish) slices.

Now you’ve got to drain the eggplant (annoying, but necessary) in a colander for 1-2 hours. Layer the eggplant in a strainer, putting a single layer of eggplant, salting the layer, topping it with more eggplant and salting again.

Put something heavy on it and leave it for at least an hour.

While you wait for the eggplant to catch up, make the sauce.

Sauce bit.

I forgot to take picture of the sauce bit, so I hope you will forgive me!

Marinara Sauce:

1.5 – 2 lbs fresh tomatoes

OR

1 14 oz can of diced tomatoes

OR

1 jar of pre-made pasta sauce

½ medium or 1 small onion, diced

3-5 cloves garlic, smashed and chopped

1 tsp Worcestershire sauce

1 tsp salt

Splash of dry red wine (you can leave this out if you want)

Ground pepper to taste

¼ tsp sugar

1-1.5 TB fresh basil, sliced, or 2 tsp dry

Olive oil

If you are using fresh tomatoes:

Put a pot of water on the stove to boil. It has to be big enough to contain all of the tomatoes under the water. Take each tomato and cut a shallow X onto the bottom of each. When the water starts boiling, slowly put the tomatoes into the water and allow them to boil for 30 seconds. Allow the tomatoes to cool by plunging them into an ice bath. When they are cool, peel them and squeeze the seeds and juices out. Chop up the rest of the pulp and put aside for now.

Pour 2 TB of olive oil into a pan and heat. Add the onion and the garlic and sauté until the onions are translucent. Add the wine and allow it to boil for a minute before adding the tomatoes, salt, pepper, Worcestershire and sugar. If you are using dry basil, add it now. If you have a stick blender or a potato masher, blend the sauce up a bit to give it a thicker consistency. If you don’t have either of these things don’t worry about it.

Your sauce will be kind of thin, especially if you used fresh tomatoes.

Simmer it for at least 20 minutes. The sauce will thicken and should look more like this.

If you are using fresh basil, add it after the sauce has simmered.

Ta da! Marinara sauce.

Put the sauce aside, you are going to use it later when you assemble the parmesan.

Right now (if the time is up on the eggplant draining) you are going to batter and fry your eggplant.

Take out your eggplant slices and line them on paper towels, patting them dry as you go.

Get two wide, shallow bowls and put the eggs in one and the breadcrumbs and flour in the other. Mix up the flour and breadcrumbs and scramble the egg but don’t add anything.

Get a deep frying pan (cast iron is the best but just use what you have) and fill it with 1/2″ of canola (or veggie) oil. Heat the oil over medium-high until it shimmers. Another way to check is if you drop a bit of the breadcrumb mix into the oil it should start to fry immediately and then rise to the surface.

Once the oil is ready, you are going to take an eggplant slice. Dip both sides in the egg, then coat it with the breadcrumb mix and slowly put it in the oil. Fry on both sides for about 45 sec, until it is golden brown. Layer between paper towels to drain (layer of eggplant, layer of paper towels, repeat). You can fry about 2 slices at a time, but not too much more than that. If you over-crowd the pan the temperature of the oil will actually lower and you don’t want that.

Repeat for the rest of the slices.

Preheat the oven to 350˚, and you are going to layer some more! Get a glass baking dish, the one I used was rectangular, I think 10×15.

Put a layer of sauce, layer of eggplant, layer of cheese, layer of parmesan. Repeat until all the ingredients are gone, making sure that you end with a cheese layer.

Put in the oven and bake for 20 minutes, until the cheese is melty and slightly browned on the edges.

Let cool for 15 minutes, then cut and serve.

NOM NOM NOM!

❤ Stef

Recipe: Roasted Potatoes and Tomatoes with Pesto

18 Sep

Hello again! Did you miss me? I’ll bet you did. I’ve had a very hectic few weeks, starting my graduate program at Boston College and moving out of my old place and into the new. Although I am IN my new place I still don’t have any of my stuff, just the items I had the foresight to pack. (Like my Shun Santoku knife and hand-made wood cutting board.) (These are ESSENTIALS, people!)

This is a recipe I’ve had “on file” for awhile. It uses slightly overripe tomatoes, pesto and potatoes, and was my response to The Great Tomato Invasion of ’09.

This summer my kitchen was overrun with tomatoes. I typically try to eat summer tomatoes raw because they are so amazing, but this year I was getting tomatoes from my father’s garden as well as my CSA box and they were EVERYWHERE.

I should probably have prefaced this by saying that I do not put fresh tomatoes in the fridge because keeping them at such a low temperature can completely ruin their flavor.

So picture, if you may, a kitchen exploding with tomatoes. They rested in bowls on my kitchen table, cascaded onto the table itself, and occasionally hung out on my cutting board. I had red ones, yellow ones, purple ones. I couldn’t eat them fast enough, and a few unfortunate tomatoes began to. . .soften. In their new cushy state, they were unsuited for use in a salad. My dad likes to stick soft tomatoes in the freezer, for use later in pasta sauce, but my freezer space is limited.

I prefer to get creative.

Roasted Potato and Tomato with Pesto:

Use 1/2 C of pesto (my recipe is at https://dinnerlove.com/2009/07/17/recipe-basil-pesto-with-walnuts/)

1.5lbs (ish) of little creamer or red skin potatoes

2 medium to large tomatoes

olive oil

salt

pepper

balsamic

Cut the potatoes into quarters, season with salt and pepper and drizzle with olive oil.

Bake at 400 degrees for 30 minutes. During that time, make the pesto (for my recipe, with pictures and instructions, see https://dinnerlove.com/2009/07/17/recipe-basil-pesto-with-walnuts/) and cut the tomatoes into small sized wedges.

After the potatoes have baked for 30 minutes, add the tomato.

Then add the pesto and about 1 TB of balsamic and mix together.

Put back in the oven for another 30 minutes. Keep the heat at 400.

Serve!

I served this alongside a roast pork loin, and it they were AMAZING together. It also tastes fantastic fried with some eggs for breakfast!

❤ Stef

Recipe: Basil Pesto with Walnuts

17 Jul

Summer is in full swing, and as such basil is everywhere. Yes, you can grow herbs at any time of year, really, but right now is when they start propagating out of control. I bought a bunch of basil as big as my head for $2 at one of my local Farmer’s Markets, and aside from the fact that I couldn’t stop smelling it (smells amaaaazing) I was immediately seized with panic.

What the hell was I going to make with all of that basil? I only have so many tomatoes! When I thought, duh. I’ll make some pesto! I had never made homemade pesto, because I thought I wasn’t a huge fan. I’m normally a tomato sauce gal. I intended my very first batch for a potato-pesto pizza (just as amazing as it sounds) and when the pesto was done I was in shock. Who knew homemade pesto could be so amazing? It didn’t taste anything like the drab pestos I’d previously been accustomed to. This was fresh, garlicy-sweet, with a slight bite. Absolutely brilliant. I immediately slathered some on toast, and while I ate thought “I’m totally making this for my next blog”.

I know that nearly everyone knows how to make pesto, and that this recipe won’t really be a revelation to anyone. I just wanted to share my enthusiasm, and to let you know that if you have never made pesto from scratch, now is the perfect time to start.

Pesto, makes about 1 C. Recipe from Simply Recipes.com.

1 C basil leaves, packed

1/4 C parmesean cheese

1/4 C olive oil

2.5 TB walnuts (You can use pine nuts if you want).

1.5 garlic cloves, sliced.

salt and pepper to taste

You will need a food processor or a blender. I have an itsy-bitsy Toastmaster Chopster. It’s a mini food processor, not very powerful, but perfect for pesto because it doesn’t liquefy the ingredients.

Put the walnuts in the food processor and pulse a few times until they are crumbly.

Grab your basil and pack a cup full of basil leaves. No stems, and make sure you pack tightly!

Chop the garlic very coarsely, add it to the walnuts in the food processor and pulse them together.

Add the basil and pulse lightly until the leaves have broken up, scraping down the sides of the processor is necessary.

Add the olive oil a little at a time, pulsing between each addition. When you are done, the mixture should be cohesive but still granular.

Add the cheese and pulse to combine.

Now taste and add add salt and pepper as you like.

You can add the pesto to anything, use it for pastas or pizza, or just slather it on a slice of french bread like me.

Yum.

❤ Stef