Recipe: Iced Coffee Cubes

2 May

I left Berlin at the beginning of April to spend three weeks in the states visiting family and friends. I came back about a week ago. While riding in the taxi home from the airport, I was struck by a strange sense that my neighborhood street had changed; become fuller, brighter. I wasn’t really sure what the change was until the next day when I was walking to meet my husband for lunch. It was leaves. In the three weeks since I had been gone every single tree in Berlin had burst into green growth.


Spring had sprung and with it came temperatures in the 70s (F) and above. Suddenly the idea of drinking hot coffee in the afternoons became upsetting. I usually make cold-brewed coffee in the summertime (when I live in a place with actual summer, that is. San Francisco does not count) but on my birthday last weekend we went to a local cafe where the iced latte was made with coffee cubes.

Coffee CUBES-brilliant! I’m pretty sure that if I did a better job of paying attention to Pinterest I would have figured out this coffee cube thing earlier but I’ve been out of touch with the internet lately. But it’s ok because apparently real life doth provide, if just a teeny bit slower than our digital friend.

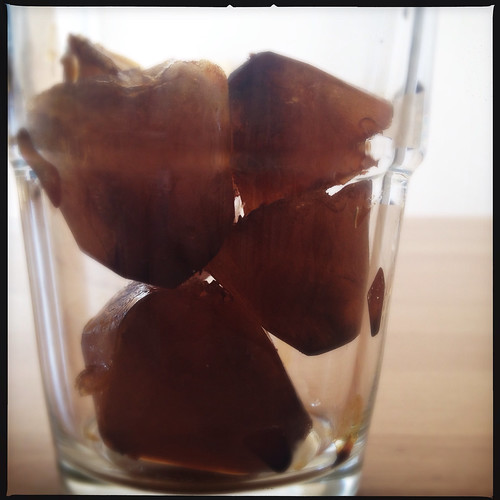
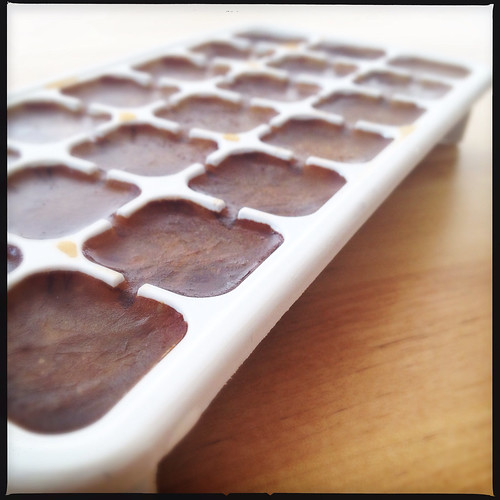
The basic idea behind the coffee cube is simple and you’ve probably figured it out already. Step one: Freeze coffee in ice cube trays.  TA-DA!

But wait! There are other things to consider. How are you going to serve your coffee cubes? With milk or with more coffee? Will you leave them whole or blend them? Will you choose to sweeten your coffee cubes? If you are more of an iced latte type person I would recommend freezing a strong coffee or espresso because it will be easier for the milk to stand up to the coffee. If you really just prefer an iced drip coffee then freeze regular coffee because the cubes will prevent your coffee from being watered down. In a similar vein, if you want to make a blended coffee beverage I would personally use a strong coffee and then blend it with milk. If you like your coffee to be sweet you can either stir in an appropriate amount of sugar into your hot coffee before cooling and freezing or you can make a simple syrup to add flavor and sweetness later. I posted about making simple syrup here. If you decide to make simple syrup you can easily make it flavored. I made mine vanilla but with other extracts and natural flavors you could easily do whatever your favorite flavor is.

Here is what I did: I made a strong coffee using my aeropress. I allowed it to cool on my counter (which took about 30 minutes) before pouring it into my ice cube tray. Then I carefully put the tray in my freezer.

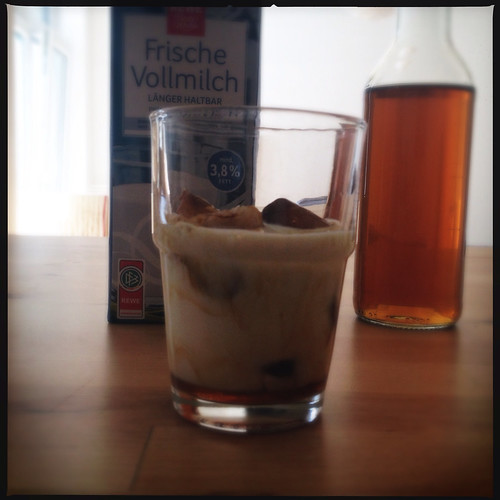
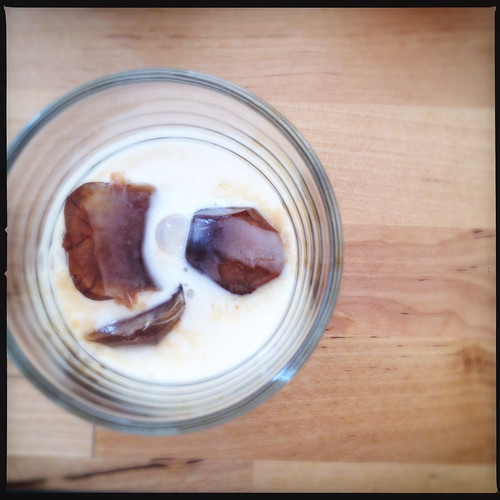
The next day, I popped a few cubes into a glass, added simple syrup and milk, and stirred to dissolve the cubes.

About halfway through I decided to try blending it so I added a few more cubes and then blended the whole thing together until it was creamy and smooth. The coffee cubes work so much better than regular ice because they are just a little bit softer. Plus, again, no watered down coffee!


P.S. Have you heard about this nify-fabulous blender trick? A regular mouth mason jar can be used in place of a blender pitcher on most blenders. Awesome right?


Happy summertime coffee drinking!


❤ Stef


How To: Make Vanilla Extract

31 Jan

When I moved to Germany three months ago there were things I was prepared for and things that I wasn’t.

What I was prepared for: language differences, crazy techno, drinking until 8am (shhhhh), snow, the absence of sunlight in winter, and a dearth of Mexican food.

What I WASN’T prepared for was the difference in baking supplies. Things I had always considered compulsory-vanilla extract, brown sugar, chocolate chips-were suddenly either completely unavailable or ridiculously expensive. You guys. A tiny-ass package of chocolate chips (maybe half a cup?) costs over 2 euro and claims to contain enough chips to make 20 cookies. They do not. I’d need at least 4 packages to make a batch of chocolate chip cookies which would cost way too much money. I haven’t had a chocolate chip cookie since I moved here.

Brown sugar is available but it is brown granulated sugar, not the dark, sticky stuff you can get in the states. Vanilla extract comes in either tiny glass vials or plastic envelopes and doesn’t taste or smell the same. It is much more sweet and syrupy.

Another surprise is that baking powder comes in packs of paper envelopes, and Germans use vanilla sugar more than vanilla extract, which also comes in paper envelopes. Many German baking recipes use these envelopes as measurements, so it’s not uncommon to see recipes call for “one packet of vanilla sugar, one packet of baking soda”, etc.

I moved to another country armed with all of my American recipes, of course, so these measurements make no sense to me and are not very helpful when I’m trying to re-create my favorite chocolate chip cookies. I’m sure I could figure out how much vanilla sugar to substitute for vanilla extract but not only does that sounds like a pain in the ass, I’m not sure how well it would work. So.

A welcome discovery was that vanilla beans are actually much cheaper than they are in the states and I decided to just make my own vanilla extract. I’ve actually done this once before on a larger scale and ended up with enough to last me almost 2 years. There are tons of formulations for vanilla extract making out there. I think the internet kind of exploded with them a few years back when someone discovered just how crazy easy it is to do.

All you need is cheap vodka, vanilla beans, and time. What?? I know. Also, an added bonus of doing this is that if you ever get desperate you can drink what is essentially your very delicious, very potent vanilla vodka. You’re welcome.

The amount of vodka to vanilla bean varies depending on how much vodka you start out with. I had a teeny bottle (about 1/2 a cup) so I only used one bean. If you have a larger bottle I would use two to three beans. A good ratio to keep in mind is one bean to every 1/2-1 cup of vodka.

First, you want to take the label off of the vodka. You can do this by soaking the bottle in a mix of water and soap for a few hours. After that the label should come right off.

Take your vanilla bean (or beans) and make a vertical cut down the length of the bean, splitting it in two but keeping the ends intact.

Put the bean in the vodka, seal the bottle, and shake to release all the vanilla particles.

Put the bottle in a cool, dark place and shake it every few days for at least a month. It will begin to take on a darker and darker hue, and after a month it is ready to use. That being said, the longer you can stand to let it infuse, the better. Two to three months would be the best.

This is the same bottle 10 days later.

This is 2 months later.

Still 2 months. Vanilla particles!

And ta-da! Vanilla extract. You can also use bourbon or rum as long as it’s high proof. (Bourbon would be super delicious, yeah?) Once it has been infused you can strain out the vanilla particles if you like but I personally don’t think it is necessary.

You can also cut the proportion of vanilla to booze in half, decrease the infusion time, and make vanilla infused booze! More on that later, perhaps?

Wouldn’t this make a great gift for that baker in your life? I’ve also heard of people making giant batches and using them as party (or wedding!) favors. What would you do with your delicious homemade vanilla extract?

xoxo, Stef

Recipe: Amy Sedaris Coffee Cake

28 Dec

Years ago, one of my good friends gifted me Amy Sedaris’ book, “I Like You: Hospitality Under the Influence”. That book is bloody amazing. Not only is Amy Sedaris hilarious (as usual) she has some really great recipes. In fact, I’ve already written about her Srgt. Pepper Cheese Ball on this blog. That cheese ball is beloved by so many that I get requests for it. I’m convinced that it is at least half the reason people invite me to their parties.

Another great recipe in the book is for coffee cake. I don’t know about you, but baking is not something that I can invent. I absolutely have to use a recipe or I’m liable to end up with something inedible. So, I am always searching for the “perfect” baking recipe. You know what I mean. The “perfect” brownie. “Perfect” snickerdoodle. “Perfect” pizza dough. This very well may be the perfect coffee cake, or at least, it is the coffee cake I always turn to.

Keep in mind that you put the prepared cake in a cold oven before setting it to 350˚ and baking.

Ingredients, Cake:

2 sticks of unsalted butter (I know. Just do it).

1 1/4 C sugar

2 eggs

1 C sour cream

2 C sifted flour

1/2 tsp baking soda

1 1/2 tsp baking powder

2 tsp vanilla

Ingredients, filling:

1 C finely chopped walnuts

1/4 tsp cinnamon

2 TB sugar

Prepare your pan by buttering it liberally. I occasionally also like to use parchment or wax paper. The original recipe calls for the use of a bundt pan but I halved the recipe and there was the perfect amount for use in a regular loaf pan.

Beat the sugar, butter and eggs until light and fluffy.


Blend in the sour cream, flour, baking soda and baking powder. Once mixed add the vanilla.

A trick to sifting flour if you don’t have a sifter (or are just plain lazy) is to whisk the dry flour.

Now that the batter is ready, make the filling by coarsely grinding (or chopping) the nuts, sugar, and cinnamon. Put half the prepared batter in the pan, followed by half the filling, then the other half of the batter and top with the remaining filling.

Uncooked coffee cake.

Place in a cool oven, set the oven to 350˚, and bake for approximately 55 minutes, or until a toothpick inserted into the center of the cake comes out clean. I would recommend checking for doneness at 30 minutes.

Cooked coffee cake.

Nom nom nom.

Oh yeah.


The most amazing thing about coffee cake is that it really doesn’t take long to prepare and cook, so you can make it for breakfast just as easily as you can make pancakes. You’re only an hour away from coffee cake town.

❤ stef


Cocktail: The Autumn Leaf

27 Nov

I’ve been really into cocktails lately.

I blame all of my visits to Rickhouse and my newfound ability to amass alcohol for this. First, Rickhouse is an amazing bar with some of the best cocktails I have ever tasted. Second, I’m finally at a stage in my life where I can both afford good alcohol and don’t necessarily consume it all the moment I buy it. (We’ve all been there ammIright?) Because of this I have managed to accrue a decent amount of alcohol; effectively creating a functioning bar.


I have seven bottles of gin you guys. SEVEN.

You know what this means? THE RETURN OF COCKTAIL HOUR! Also it means that I have been teaching myself how to make cocktails more complicated than a gin & tonic. Though there is nothing wrong with a gin & tonic. They are delicious AND distinguished.

Inspired by my recent cocktail shenanigans, I created this delicious bourbon cocktail that I like to call the Autumn Leaf. No leaves were harmed in the making of this cocktail.

3/4 oz lemon juice

1/2 oz maple syrup

2.5 oz bourbon

1/2 oz apple cider (or juice)

2-3 dashes old fashioned bitters

cinnamon & sugar for rim

First rim your glass. Mix together some sugar and cinnamon on a plate, rub lemon or some water along the edge of a short tumbler, then invert the tumbler onto the plate and twist it around to rim the glass with the cinnamon sugar.


Then add all ingredients into a cocktail shaker filled with ice. You can be creative with this. No cocktail shaker? It’s cool. I don’t have one either. I use a mason jar. LIKE A BOSS. That little ducky is a ml/oz measure.

Shake shake shake.


Strain into the prepared glass (no ice).


Enjoy.

You can ALSO make this in a taller glass with the addition of ginger beer. If you do this, follow all steps above, except strain into a tall glass filled with ice and top off with ginger beer.

Also yum.

I just drank all the bourbon in my house you guys. Oops.

❤ stef

Recipe: Breakfast pop tarts

4 Oct

When I was a child I absolutely LOVED pop tarts. Sweet fruity filling and crispy icing in a hand held package? Sign me up! Toaster strudels took this one step further, of course, by giving the humble toaster pastry real fruit filling and a better crust. These breakfast treats were my kryptonite.

THEN.

I realized (with the help of the internet) that I could make them myself, and fill them with ANYTHING I WANTED. What is the toaster pastry, after all, if not a mini pie?

So although in this post I make breakfast pastry, you should feel free to fill your pop tarts with whatever strikes your fancy. I have used nutella, chocolate chips with a sprinkle of salt, all kinds of jams, cheese, and of course, bacon and eggs!

First you need dough. You can either make your own or use a pre-made dough like a pie dough or the pillsbury crescent roll dough. I make my own because it’s cheaper.

You can use any pie or pastry crust recipe that works for you. The one I like is below. It’s a nice, fast pie crust that doesn’t require chilling.

Quick Pie Crust

2 1/2 c. Flour
1 c. Shortening
1 Tsp. Baking powder
1/2 tsp. Salt
1 egg + 1/2 c. cold water

Sift the dry ingredients together. Add the shortening using a fork or pastry cutter and mix until chunky. In a separate vessel crack the egg and add very cold water until the mix measures half a cup. Whisk the egg and water together then pour the mix into the dough and continue to work the the fork/pastry cutter. When the mix becomes more of a solid mass start kneading it with your hands. Cut the dough in half and roll into two balls.

For the filling:

3-4 eggs, scrambled

3-4 pieces of bacon, very crispy

cheese of your choice

Make sure that either your bacon is super crispy or cut it into pieces, otherwise it will be hard to bite off inside the tart and it will all come out in one bite. Don’t you hate that?

Now. Start cutting and rolling out your dough. Roll the dough to 1/4″ thin (ish) and make it as rectangular shaped as you can manage. Cut the large rectangle into smaller individual pie crusts. I aimed to make the tarts hand-size. I don’t have specific measurements for this but just cut them out and don’t worry so much about it. They will all be delicious regardless of their size!


Put the filling on one side of the tart crust.


Flip the dough over the filling and crimp the edges. You can also square off the tart by cutting off excess dough. You can see here that I used some extra dough to cover places where the bacon had torn through the top of the tart. Pesky bacon.


Poke holes into the top of the tart and place on a baking sheet. Repeat until you run out of dough or filling.

If you like you can brush the tops with a wash of scrambled egg and a little water. This will make the tarts shiny and golden once baked-but this is not necessary.

Bake in a 350˚ oven for 20-25 minutes, until golden brown around the edges.


Enjoy!


Breakfast is SAVED!

xoxo

❤ stef

How To: Make Mustard

25 Sep

It turns out that making mustard is very, very easy.

Who knew, right?

The basic components of mustard are mustard seeds and vinegar. There are endless variations of mustard you can make by building off of these two ingredients. Mine, for example, contains honey and beer. Other ingredients you can use include wine, sugar, herbs, garlic, and maple syrup. Here is a basic recipe:

3 TB yellow mustard seeds

3 TB brown mustard seeds

vinegar to cover seeds, such as cider vinegar

your favorite beer

2-3 tsp salt

1 TB honey

Whatever you add, all mustard starts the same. You must soak the mustard seeds in vinegar overnight. I use a half and half combination of yellow and brown mustard seeds. Then I cover the seeds with vinegar plus about 1/2-1″.


The next morning, blend the seeds and vinegar until they become a paste.

At this point you should add more liquid. I used beer. Add a little at a time until the mustard has a more liquid consistency. This is completely up to you and is very difficult to get “wrong”-so don’t worry about it too much. This is also when you should add salt and a sweetener if you would like. I used honey.

Pour the completed mustard into a jar.

Loosely tighten the cap and allow the mustard to sit on the counter for 1-2 days. This will allow the flavors to blend and mellow. After that tighten the lid and store in the fridge.

Eat. Nom nom.

You will never buy mustard again.

❤ stef

Recipe: Tortilla Espanola

7 Mar

Tortilla Espanola is a Spanish tapa (bar snack). It’s made with potatoes, onion, olive oil, and egg and is CRAZY delicious. It’s relatively easy to cook, but the execution can be tricky. You see, you cook the whole mess in a frying pan and then you have to finagle it out by flipping it onto a plate. I think I’ve FINALLY mastered the technique but I have definitely destroyed a few in my day. But, as Julia Child said, if you’re alone in the kitchen, WHO’S GOING TO KNOW? No one, that’s who. So it rips in half. You’re cutting that bitch into slices anyway. Nom.

6-7 medium sized potatoes

5-6 eggs

1 medium-large onion

Lots of olive oil

salt and pepper

Cut the potato and the onion in half lengthwise and then slice thinly. The slices will be in half-moon shapes.

Mix the potatoes and onion together in a bowl and salt liberally. Heat olive oil in a frying pan and add the onions and potatoes. You want enough olive oil to barely cover the veggies-maybe 1/2 a cup? Fry the vegetables until the potatoes are tender, but make sure they don’t burn. You’ll know they are ready when you can break a potato in half with a spatula.

Crack the eggs into a large bowl and whisk them together. Pour the potatoes and onions into the egg and mix. Add a tablespoon more oil to the frying pan and then pour the potato-onion-egg mix into it and spread it evenly around.

Allow to cook until the edges of the egg are slightly browned. The egg will still be runny, but the bottom will be cooked.

Now you can do one of two things to cook the other side. If you have a frying pan that is oven safe, turn the oven to 350 and cook the tortilla for 10 minutes to set the top. You still have to brown the top, though, so you’re going to need to flip the tortilla.

Grab a large plate and put it on top of the frying pan. Put your hand firmly on the plate and quickly flip the pan over so that the tortilla ends up on the plate. Put the frying pan back on the stove with a little more olive oil and allow to heat for a few seconds, then slip the tortilla back into the frying pan and brown for 2-3 minutes.

If you don’t have an oven safe frying pan, you’re going to have to flip the tortilla without the time in the oven first. This will work it just might be a smidge bit more messy. It’s ok though. It will be delicious either way!

When you’ve browned the other side, slip the tortilla onto a plate and cut into wedges.

Serve.

Yum yum yum.

❤ stef

Recipe: Strawberry Jam

18 Jan

It’s officially winter. Part of me loves winter-I grew up in California, in the uber-temperate Bay Area, and despite what many Bay Area natives will tell you, winter doesn’t really exist there. Yes, it gets colder. Sure, you have to wear a jacket. But until I moved to Boston I never had to buy a winter-specific jacket, never had to fully change my wardrobe (my CA winter wardrobe consisted of summer clothes with the addition of tights, boots, and jackets), and never had to deal with snow.

When I first moved I was wary. I had no idea what kind of jacket to buy. My classmates (most of whom were from the east coast) made fun of me. I didn’t mind. I probably would have made fun of me too. The truth is that I grew to love it. I like snow, and the freezing temperatures, and the excuse to drink warm alcoholic beverages on a cold winter night. I like wool and I like to knit warm hats for me and my friends. I like subsisting on stews and roasted meats, and I like watching the snow fall outside my bedroom window.

That being said, sometimes a respite from the freezing temperatures and the gray weather is necessary. Sometimes it’s nice to create a bit of summer, enjoyable even, even if it’s just you in your kitchen, making jam from frozen strawberries.

Strawberry Jam for Wintertime

1 16 oz bag of whole frozen strawberries

1 C sugar

Skin of 1 tart green apple

1 tsp lemon juice

Sprinkle of cinnamon

Sprinkle of ginger

First you have to let the strawberries defrost a bit, so leave the bag out on the counter for an hour or so. Or, if you’re in a hurry (like me), throw it in the microwave for 30 seconds at a time until the berries aren’t as hard.

Put the strawberries and the sugar in your pot and just allow them to sit for about 15 minutes. Don’t turn the heat on yet, just coat the berries in the sugar and let them get all sugary.

Mash them with a potato masher. If you don’t have a potato masher, use a fork.

Bring the jam to a boil on a medium heat setting. Boil for about 10 minutes, stirring frequently. Add the lemon juice, the cinnamon and ginger, and the apple peel.

The apple peel is a natural source of pectin. The more you learn, right?

Return to a rolling boil and stir until you can’t stir down the boil anymore. It should be really bubbling away. Boil for another two minutes.

Turn off the heat source and check to see if the jam is set by using the back of a frozen spoon. If you look closely at the image above you can see a line drawn in the jam on the back of the spoon. That’s how you know it’s ready.

Ladle into jars.

At this point, you can choose to process it in a water bath if you like, or you can just stick it in the fridge. I chose to just keep it in the fridge. This recipe only make a little bit of jam and I was planning on using it right away. If you WANT to water process it, you need to have the correct canning jars. Finger tighten the rims and process in a water bath-a rolling boil-for about 10 minutes. Remove from the water bath and cool for 24 hours. Check the seals on the jars to make sure they are tight, then store.

And there you have it. Delicious jam for the wintertime; guaranteed to lift your spirits.

❤ stef


Recipe: Gingerbread Caramels

21 Dec

Christmas, oh Christmas.

I’m not religious but Christmas is  my guilty pleasure. I love the holiday season in general-that magical time between Halloween and New Year’s makes me all gooey. It’s probably all of the alcohol and baked goods you’re encouraged to imbibe. (Hey-o!)

Since my fiance joined me on the east coast a year ago, we’ve only gone back home for one holiday a year, which means picking between Thanksgiving and Christmas. Last year we went home for Xmas. This year was Tgiving. And so, schmoops and I will be celebrating Christmas with our cat this year. Honestly? I’m really excited about it. I’m making epic Christmas brunch, we’re going to lay around in our pjs, open presents, and maybe go to a movie. Our theatre here has a bar inside of it so, because it’s Christmas, I’ll probably splurge and buy us movie-themed adult beverages to enjoy. You know. Live it up.

The downside of spending Christmas (almost) alone 3,000 miles away from the rest of your family is that Christmas presents begin to pose a problem. Add to that the fact that you’re broke and you’ve been unemployed for 5 months (guilty…) and you see what I’m talking about. This called for creativity. What could I send loved ones that would be inexpensive, easy to mail (to three different countries), and universally well received?

CANDY!

Specifically, caramel. Gingerbread caramel. Thank you, Ms. Martha Stewart.

Gingerbread Caramels

4 cups (2 pints) heavy cream

2 cups light corn syrup

4 cups granulated sugar

12 tablespoons (1 1/2 sticks) unsalted butter, cut into small pieces

1/2 cup unsulfured molasses

1 teaspoon pure vanilla extract

3/4 teaspoon salt

1 teaspoon ground cinnamon

3/4 teaspoon ground ginger

3/4 teaspoon freshly grated nutmeg

1/4 teaspoon ground cloves

Vegetable-oil cooking spray

A quick note about the corn syrup-I really didn’t want to use it. I’m a giant hippie deep down inside so I think corn syrup is the devil. Also, my best friend’s little daughter is allergic to it and I wanted her to be able to eat these things. However, at the last minute I got lazy (and I had a random bottle of the stuff) that I wanted to use. If you’re interested in corn syrup substitutions, there are lots of suggestions on the ol’ interwebs. The best ones I found were to make a thick simple syrup  from water and sugar, or to use honey. I think you can also use tapioca syrup and/or agave syrup.

ONWARD.

Prepare your pans. This is what you will be pouring the hot caramel into to cool. The recipe suggests using a 12×17 inch rimmed pan, but I didn’t have one of those so I just used what I did have, and made sure that the sum of their measurements matched. The caramel is crazy sticky, so you have to grease the bottom and sides of all the pans. Then, line the pans with parchment or wax paper, and grease the paper as well. Trust me on this. You want to do it.

Bring the cream, corn syrup, sugar, butter, and molasses to a boil. Continue to cook over medium-high heat until it reaches 248˚F. The amount of time it takes to do this will vary depending on your altitude and what you put in the caramel. I swear it took me almost an hour. The thing is-it is very important that you reach that 248˚ mark. If you don’t the candy won’t be thick enough and it won’t harden properly.

Boiling boiling.

Once it reaches 248˚, turn off the heat and stir in the spices, the salt, and the vanilla.

Pour the mixture into your prepared pans. Allow to sit undisturbed for 24 hours. This is to make sure the caramel cools completely. Also, I would recommend that you lightly cover the pans with a clean dishcloth. Caramel is sticky. You don’t want any dust or..whatever else getting in it.

The next day, get yourself a cutting board and a knife. I used my pizza cutter, which, incidentally, I have never used to cut a pizza. Grease the cutting surface and your cutting implement. Turn the caramel over onto your prepared surface. You might have to use a knife to loosen the parchment overhang, but if you greased properly this should be easy. Then you’ll have to peel the paper from the back of the caramel.

Cut the caramels into 1″ pieces. I actually used a ruler and traced a light grid onto the caramel before I cut them. You don’t have to do that if you don’t want to, but I found it helpful.

Wrap the individual pieces in wax paper or parchment paper.

Twist the sides to make them look like real candy.

If you’re giving them as gifts, you can put them in fun little cellophane bags. I used a free template to print those stickers, which can be found here.

The whole process was really quite easy, if time consuming. I hand-wrapped over 100 caramels, you guys.

❤ stef

How To: Homemade Coffee Creamer

4 Nov

I don’t know about you, but lately I’ve had an undeniable craving for pumpkin spice ANYTHING.

I’m not really a big fan of pumpkin pie, pumpkin spice lattes, or even pumpkin, really, so this is a bit of a surprise for me. I think it has less to do with the “pumpkin” and more to do with the “spice”. I’m a big fan of “spice”. The pumpkin is just an ingredient I can’t get away from.

In the last few weeks, I’ve made pumpkin spice syrup, pumpkin spice pancakes (more on these later…), and the subject of today’s ramblings-pumpkin spice coffee creamer. I found the recipes for homemade coffee creamer on Pinterest (um, how great is Pinterest? You should follow me.) and was crazy excited. There are a bunch of recipes for different flavored creamers up there, but I singled out the pumpkin spice one, of bloody course. I did change it just a bit but the basics are the same. If you want to experiment with making other flavors, definitely check out Deliciously Organic. It seems to me that once you get the general idea, you can make any kind of flavor your little brain can imagine. Yum.

1 C heavy cream

1 C whole milk

3 TB pumpkin puree

1/2 tsp cinnamon

1/4 tsp ginger

1/8 tsp clove

1/8 tsp nutmeg

(Quick note here: for the spices, the original recipe calls for 1 tsp pumpkin pie spice. You can use that, or the spices I’ve listed here, or really any combo you like. The most important is cinnamon and I wouldn’t use too much ginger, clove or nutmeg just because they can be kind of strong. Steffany out.)

6 TB maple syrup

1 tsp vanilla extract

Mix all ingredients, EXCEPT vanilla, on a pot on the stove. Heat, whisking together, until the mix starts to steam. Don’t let it boil. Remove from the heat and whisk in vanilla. Let cool until room temperature. On a hot day, do this in the fridge. No one wants bacteria. Once cool, strain through a fine mesh sieve, pour in a bottle and store in the fridge.

I added more maple syrup to my creamer than the original recipe, but I (personally) still find that I like a tinge bit more sugar in  my coffee. What can I say? I like my coffee super dark and sweet. It’s the best. If you find that the creamer isn’t sweet enough for you, you can always add more maple syrup and shake it into the creamer, or you can just add some extra sugar to your coffee.

Happy morning time!

❤ stef