Tag Archives: breakfast

Recipe: Amy Sedaris Coffee Cake

28 Dec

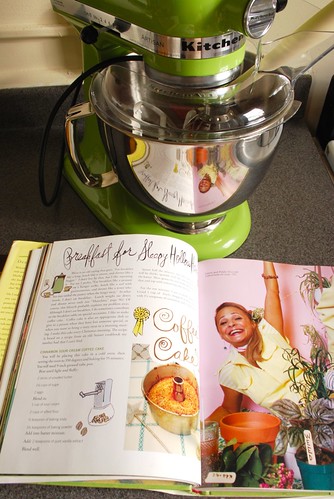
Years ago, one of my good friends gifted me Amy Sedaris’ book, “I Like You: Hospitality Under the Influence”. That book is bloody amazing. Not only is Amy Sedaris hilarious (as usual) she has some really great recipes. In fact, I’ve already written about her Srgt. Pepper Cheese Ball on this blog. That cheese ball is beloved by so many that I get requests for it. I’m convinced that it is at least half the reason people invite me to their parties.

Another great recipe in the book is for coffee cake. I don’t know about you, but baking is not something that I can invent. I absolutely have to use a recipe or I’m liable to end up with something inedible. So, I am always searching for the “perfect” baking recipe. You know what I mean. The “perfect” brownie. “Perfect” snickerdoodle. “Perfect” pizza dough. This very well may be the perfect coffee cake, or at least, it is the coffee cake I always turn to.

Keep in mind that you put the prepared cake in a cold oven before setting it to 350˚ and baking.

Ingredients, Cake:

2 sticks of unsalted butter (I know. Just do it).

1 1/4 C sugar

2 eggs

1 C sour cream

2 C sifted flour

1/2 tsp baking soda

1 1/2 tsp baking powder

2 tsp vanilla

Ingredients, filling:

1 C finely chopped walnuts

1/4 tsp cinnamon

2 TB sugar

Prepare your pan by buttering it liberally. I occasionally also like to use parchment or wax paper. The original recipe calls for the use of a bundt pan but I halved the recipe and there was the perfect amount for use in a regular loaf pan.

Beat the sugar, butter and eggs until light and fluffy.


Blend in the sour cream, flour, baking soda and baking powder. Once mixed add the vanilla.

A trick to sifting flour if you don’t have a sifter (or are just plain lazy) is to whisk the dry flour.

Now that the batter is ready, make the filling by coarsely grinding (or chopping) the nuts, sugar, and cinnamon. Put half the prepared batter in the pan, followed by half the filling, then the other half of the batter and top with the remaining filling.

Uncooked coffee cake.

Place in a cool oven, set the oven to 350˚, and bake for approximately 55 minutes, or until a toothpick inserted into the center of the cake comes out clean. I would recommend checking for doneness at 30 minutes.

Cooked coffee cake.

Nom nom nom.

Oh yeah.


The most amazing thing about coffee cake is that it really doesn’t take long to prepare and cook, so you can make it for breakfast just as easily as you can make pancakes. You’re only an hour away from coffee cake town.

❤ stef


Recipe: Peach Cobbler

26 Oct

When I was a child, I was enamored of the kitchen. I always used to ask my mother if I could help her cook dinner, and I was always very annoyed when she told me I could make the salad.

The salad? I would think.

A salad is not cooking. I wanted to use the stove to make something real. I wanted to do something, anything other than make that very boring salad.

So suffice to say that I starting cooking (for real) at a very young age – I made my first pie (chocolate cream) when I was ten. Maybe younger. So the other day (ok fine, the other MONTH), when I was rifling through my things at my parent’s house, I was absolutely delighted to find my old childhood cookbooks. I have three – The Boxcar Children’s Cookbook, Addy’s Cookbook, and Samantha’s Cookbook (the latter two are both American Girls cookbooks. Shush you in the back! Did you make apple brown betty when you were twelve? I thought not).

As a quick side note-I am very pleased to learn that the American Girl franchise is still creating new stories and new girls. I absolutely adored American Girl when I was growing up, and I collected all of the books about all of the girls available at the time. I think it is a fantastic way to introduce American history to pre-teens, and even more amazing that all of the stories are told from the viewpoint of the girls themselves. These stories sparked so much more interest in me for the time line of American history than any class ever did, and I just can’t speak highly enough of them.

Back to the food! Upon my re-discovery of these cookbooks, I decided it would be fun to do a series on recipes made from them. Since I am really nothing more than a child at heart, and besides, I’ve never found a better recipe for many of the items in these books. Hell, I still make milkshakes the way the Boxcar Children taught me.

This recipe is from Addy’s Cookbook.

Recipe:

Filling:

4 C sliced peaches (you can use frozen if you like)

2 TB flour

1/2 tsp cinnamon

1 C sugar

Crust:

1 C flour, plus some extra for rolling out the dough

1 TB sugar

2 tsp baking powder

1/4 tsp salt

3 TB butter

6 TB half and half

1 tsp cinnamon

1 tsp sugar

Slice the peaches.

Add the flour, cinnamon and sugar, mix together and spoon it into a greased baking pan or a skillet.

For the crust, mix together the flour, sugar, baking powder, and salt. Cut the butter into small chunks and smush them into the flour mixture with a fork until you have pea-sized lumps. Add the half and half and stir until the ingredients are just moistened. Sprinkle some flour on a surface (like a cutting board), turn the dough out onto it, and knead the dough for about 30 seconds. To knead, push down on the dough and then fold it in half and repeat. Using a rolling pin, (or, if you don’t have one like me, any cylindrical object. I’m rather fond of wine bottles!) roll out the dough starting from the center and working your way out until it is 1/4″ thick.

Like this!

Like this!

Cut the dough into strips, or use a cookie cutter to make shapes. I went for strips because I don’t have cookie cutters. I know, you’re just thinking, “How does this woman survive in this world?! No rolling pin and NO COOKIE CUTTERS??” It’s hard. But I manage. During Christmas time I either make drop cookies or cookie strips. Better for dunking that way.

Lay the pieces over the fruit and sprinkle cinnamon and sugar over it all.

Mmm, cinnamon-y.

Mmm, cinnamon-y.

Bake in a 425˚ oven for 30 – 35 minutes, or until the crust is golden.

It should look something like this.

It should look something like this.

Ta da!

Cut and serve. You can serve with whipped cream or ice cream if that suits your fancy. I eat mine plain, for dessert and for breakfast. Because I’m an adult now, and I can do that. Hahahaha!!!

❤ Stef

Recipe: Lemon Thyme Donuts

5 Jun

Today is National Doughnut Day, which is pretty awesome. Every year I find out about more semi-obscure holidays extolling the virtues of all kinds of foods. Examples: National Popcorn Day, National Pie Day, National Candied Orange Peel Day, and National Cherries Jubilee Day. You should go look around on that website. There is a celebration nearly everyday.

So in honor of today’s holiday, I decided to make some donuts. Makes sense, yes? Though I do wonder, how does one officially spell “donut”, anyway? I see it spelled “donut” and also “doughnut” and am very confused. Which is correct? Does it matter? Is one more popular than the other? It seems to simply vary from one shop to the next, without rhyme or reason. I’ve elected to use “donut” because there are fewer letters. Also, the Donut Wheel, the best donut shop ever, utilizes that spelling. I bow to them as the donut gurus.

Donuts with Lemon-Thyme Glaze

Donut recipe from Secret Donut Recipe; glaze modified from their vanilla glaze recipe.

Donuts:

1 C warm milk

1 pkg yeast

2 C flour

1/2 C warm mashed potato

1/2 tsp salt

1/4 C sugar

2 TB oil

Yes, this recipe uses potato. At first I thought that potato was a very strange ingredient, but I decided to give it a chance because I love potato bread so much. It was not a mistake. These donuts are amazing! Very easy to handle and results in a fluffy and moist donut. Give the potato a chance!

So first, what you will want to do is prepare the potato. Prick it all over with a fork, and put it in the microwave to cook. If your microwave has a baked potato setting, use that. Otherwise, microwave for a minute or two at a time and check it . The potato should be soft to the touch. Let the potato cool and warm the cup of milk. Add the yeast to the milk along with a pinch of sugar and allow to sit for 5 minutes. Cut the potato in half and scoop out the insides. Add the flour, sugar, and salt.

Mix together and add the milk and yeast, and 2 TB of oil. Mix with your hands (or using a stand mixer, but I don’t have one of those) until the dough forms a cohesive ball. The dough will be a little sticky.

Spread a surface with flour, turn the dough onto the surface and knead a few times.

Spread to 1/4 – 1/2″ thick. I did mine about 1/4″ using just my hands and a cylindrical rum bottle. I don’t have a rolling pin, either!

Cut donut shapes using either a donut cutter (which I also do not have) or circular household objects. I used a drinking glass for the large circle and a bud vase for the small circle. I’m resourceful!

Let the donuts rise for 10 minutes. While you wait, fill a cast iron pan 1/2″ with oil and heat. I heated mine at about medium heat for 10 minutes and the oil temperature was perfect. During this time, you should also make the glaze.

Lemon-Thyme Glaze

2 TB warm milk

1/2 tsp butter, just a little shave off of a stick

1 C powdered sugar

1 tsp vanilla extract

1 tsp lemon zest

1/2 tsp dried thyme

Warm the milk and the butter. Add to the powdered sugar and mix. Add the lemon zest, vanilla, and thyme. Mix together. Feel fee to leave out the lemon and thyme if you would prefer a simple vanilla glaze.

Cook the donuts until golden brown on each side. This only takes a few minutes, so be sure to watch carefully.

Let cool on a plate lined with paper towels. When the donuts have cooled, dip them into the glaze to cover and put them on a plate to allow the glaze to set.

Look at that deep fried glaze-y shine. Perfection! And yes, they absolutely do taste as delicious as they look!

Now excuse me, I have a half dozen donuts to eat.

❤ Stef

Recipe: Buttermilk Biscuits and Maple Cream

18 May

Sorry about the Friday debacle. I totally did not intend for this delay to happen, I usually just assume I will have computer access wherever I go. I should probably stop assuming things.

I’m going to admit that I made these biscuits as a vehicle for the maple cream that is to come. Not that I don’t enjoy a nice biscuit, quite the contrary, but I really just needed something to slather with maple cream and I thought you might too.

Biscuits:

2 C flour
1/4 tsp baking soda
1 TB baking powder
1 tsp salt
6 TB butter
1 C buttermilk

Pre-heat the oven to 450˚.
Mix all of the dry ingredients together.

Cut the butter into tiny cubes.

Cut into the flour until it looks like course cornmeal. You can do this with a fork, or use a food processor. I used my immersion blender and it worked wonderfully!

As a side note, I got this immersion blender for my birthday and I am in LOVE with it. I’ve wanted one for a few years, but didn’t really think I would use it nearly as much as I do. It’s amazing for so many reasons, but one of the things I like the best about it is that I can make milkshakes directly in a glass! YUM!

When the mixture looks about right, add the buttermilk. Mix together just to blend. Don’t over mix or the resulting biscuits will be tough! Wet your hands and scoop the dough into biscuits approximately 1/4 C in size. Pat gently to make a thick, flat disc shape and put on a cookie sheet 1/2″ apart.

Bake for 8-10 minutes, until the biscuits are slightly golden. You don’t want them to be brown.

Maple Cream!

I love, love LOVE maple cream! I had it for the first time years ago, in a teeny tiny jar labeled “maple butter” that my aunt had gotten in some kind of gift basket. I didn’t try it again until I moved to San Francisco and found it in a health food store (for the curious-Green Earth Natural Foods, home of the lovable grumpy old man). When I went on a search for a recipe, I found that what I was eating was technically not called maple butter but maple cream. Who would have known? Not I, child of the west coast.

So maple cream is deliciously delicious. It tastes like maple syrup but better. The process (you basically just heat, cool, then stir) makes the syrup sort of crystallize, and it is turned into a thick, sweet, spreadable, opaque ambrosia suitable for using on anything you would regularly put maple syrup on or for simply eating with a spoon. Which I have done. And it’s AMAZING.

1 C pure maple syrup – you can use more. This makes a smidge bit more than 8oz (1C) of maple cream.
a few drops of veggie oil

Fill a sink full of cold water.

Put 1 C of maple syrup and a few drops of veggie oil in a large pan. You can see the veggie oil drops, to the right in the picture.

Put a thermometer that can reach 236˚ into the maple syrup and turn on the heat.

Make sure the thermometer isn’t touching the bottom of the pan, just the syrup. I used a rubber band to secure it to the handle of the pot on the outside to do this. Boil the syrup until it reaches 236˚. I should note here that, according to the majority of the recipes I read, the temperature should be 24˚ over the boiling point of water. I just tacked on 24 to 212 because I live in San Francisco, which is basically at sea level, but depending on where you live this number may be different.

my ultra-cool, maple cream making thermometer apparatus.

my ultra-cool, maple cream making thermometer apparatus.

Watch the syrup! You want it to boil, you do not want it to boil over. So be careful!

When the syrup reaches 236˚, turn off the heat.

This is what the syrup looked like when it reached the correct temperature.

This is what the syrup looked like when it reached the correct temperature.

Place the entire pot in the cold water. Do not touch or stir the syrup. Simply allow it it come to room temperature. You will know this has occurred when it is no longer giving off heat.

Remove from the water and slowly stir the syrup until it becomes opaque. This is the hardest part. I’m going to be honest, I felt like my arm just might fall off. But the persistent will be deliciously rewarded. You’re done when it has reached the consistency of very smooth peanut butter. Spoon into jars and refrigerate.

When I first started with the stirring.

When I first started with the stirring.

after a few minutes.

After a few minutes.

After a few more.

After a few more.

This is the result of too much stirring!

This is the result of too much stirring!

If you stir it too much, it will get too hard. That happened to me, and I ended up having to start the process all over again! Very annoying, and set me back another hour. Just remember that you want it to be a spread, not a candy. The result should be somewhere between pictures 3 and 4.

Spread it all over everything. Like those lovely biscuits you just made! NOM!

❤ Stef

Recipe: Eggs Benedict, featuring the most amazing Hollandaise sauce you will ever eat.

9 May

Eggs Benedict and I go back. Way back. It was one of the first dishes I taught myself how to make. I had it for the first time in a restaurant in Livermore, CA while having brunch with my mother’s side of the family and immediately thought that it was one of the most delicious things on the planet.

This is because it is nearly all fat, of course, but I digress. All things in moderation! Just eat some vegetables for dinner and you’ll be fine.

Eggs Benedict is the perfect dish to make when you want to impress someone in the morning. Be it your girlfriend (or boyfriend), the person you just happened to wake up next to, or even a family member. Your mother, perhaps? There is a day for celebrating mothers, you know, and it’s quite close.  Your mom would be super-impressed if you showed off your mad cooking skills with a little eggs bennie.

Besides, I’ve got the secret to the best hollandaise sauce in town. You don’t even have to tell her about me. It will be our little secret. 😉

Note: this recipe serves 2.

2 whole english muffins
4 slices canadian bacon
1/2 stick of butter
7 eggs – 3 just yolks
2 tsp lemon juice
pepper (white pepper if you have it)
1/2 tsp salt
smidge bit of paprika (optional)

Hollandaise:
3 egg yolks, 1/2 stick of butter, lemon juice, salt and pepper.

Most recipes that I have looked at call for 3 egg yolks to 1 stick of butter. This is mularkey. Don’t listen. You may think I am crazy for doubling the amount of egg (and hey, maybe I am) but this is how I’ve made Hollandaise since the beginning of time. (Ok, 10 years). Also, you NEED the lemon. I’ve been known to order Hollandaise on the side with a side of lemon in restaurants, whereupon I promptly receive dirty looks for adding more lemon before I put the sauce on anything. What can I say? I know what I like.

look, there I am in my blue striped dress!

First thing’s first, you will need a double boiler to make the hollandaise. I don’t have one, so I fake it with a metal bowl and a saucepan. You can use any bowl that is large enough, and that is heat-resistant.

Take 3 eggs, and separate the yolk from the white. Use the egg shell to help you do this by slowly transferring the yolk from one half to the other until the white has completely separated into a bowl below. Put the yolks into your metal bowl (or the top half of your double boiler).

Cut the butter into small pieces. This will help it to melt faster when you add it to the egg.

Fill the bottom half of your double boiler with a few inches of water. Set it to heat on medium. You want the water to be at a simmer. When the water is simmering, place the top half of your double boiler over the water and whisk the egg yolks. You must whisk constantly, or you risk the eggs curdling. Continue to whisk until the yolks become thick and bright yellow, about 1-2 minutes. Take the yolks off of the heat and whisk in the butter. Return to heat, whisk constantly until butter dissolves, then take back off the heat and add the lemon, salt and a few turns of a pepper mill. If you use white pepper, just sprinkle a bit in. Add more lemon and salt if you think it needs it. If at any point during this process you see that the eggs have begun to curdle, add a tsp or two of boiling water and whisk it in. Leave the sauce off of the heat and poach the eggs.

Fill a pot half full with water and add 2 TB of white vinegar. The vinegar helps keep the egg together while you are cooking them. Set the pot over high heat and wait for the water to boil, reduce to a simmer, then crack all 4 eggs into the water and cover. Cook for 1-2 minutes.

While the eggs cook, toast the english muffins.

And fry the canadian bacon.

Right before you’re ready to assemble, heat the hollandaise through by putting it back on the double boiler. Remember to whisk! Whisk whisk whisk.

Now assemble-
english muffin
slice of canadian bacon
egg
top with hollandaise.

This, ladies and gentlemen, is what I dream about.

I also want to say, quickly, that this recipe is very easily modified into a number of different types of benedicts, such as eggs florentine-which substitutes spinach for the canadian bacon. This is a good option for our vegetarian friends, and peoples who might worry about their waistline. Of course, that hollandaise is a real diet-killer, but so very worth it!

❤ Stef

Recipe: Blueberry and Cheddar Pancakes

27 Mar

I have to be honest and say that this recipe isn’t mine. I stole it from Aleta Meadowlark (which might just be the coolest name EVER), who runs the blog Omnomicon. She stole it from The Joy of Cooking. I took it and made it fit for the lazy person in your life. The original recipe involves making the pancakes from scratch. This is not difficult by any means, but I always use Bisquick for my pancakes. Bisquick is always what my father used, and I always thought that his pancakes (made with Bisquick) were much better than my mother’s pancakes (made from scratch.)
Anyway, to view the original recipe, go check out Omnomicon. For my lazy version, read on.

Ingredients:
Bisquick (2 C)
2 eggs
1 C milk
1 tsp Vanilla
1/2 C frozen blueberries
1/2 C shredded cheddar cheese

You are going to make two batches of pancakes-a cheddar batch, and a blueberry batch. This way you can eat the cooked pancakes together, for maximum delicious. Get out two medium sized bowls, and put 1 C Bisquick, 1 egg, 1/2 C milk, and 1/2 tsp vanilla in each.
Mix the ingredients together half way. Alton Brown (my idol) says that Americans have a tendency to beat batter into oblivion, and that we should all chill out and leave well enough alone. I’m paraphrasing, of course, but he has a point. So resist the urge.Measure out 1/2 C of the frozen blueberries and choose a batter bowl to add them to. I chose the red bowl. You are supposed to thaw and drain them, but I didn’t bother. This didn’t seem to affect the pancakes in any way, but you can feel free to take the extra step if you like.
Shred 1/2 C of cheddar cheese, and add it to the other bowl.
Mix both bowls again so that the additional ingredients are distributed. Purple pancakes? Awesome!Heat a non-stick frying pan over medium-low heat, and add about 1/2 tsp of veggie or canola oil. Once the pan is hot, drop about 1/4 C of batter per cake. Flip when the tops get bubbly. Repeat as needed.
Forthcoming-Pancake Porn.

Mmmmmm.Oh yeah.

Serve stacked on top of each other.
I LOVE the way they look like this, all colorful, stripey and fun! I think this will be my new desktop image. I admit, seeing them stacked on top of each other is part of the reason I decided to make them to begin with. That, and cheddar cheese in pancakes sounded way too good to pass up.
Can you imagine serving these for breakfast? MAJOR points, people. Major points.

❤ Stef

Recipe: Poached Eggs with Dijon Dill Sauce

15 Feb

I’ve been really lazy lately–not posting anything, and I haven’t taken any pictures in awhile, either. I’m going to try to start posting a new recipe every Friday, but I can’t promise I’ll have a bunch of pictures to match. I try; but it is really difficult to cook and photograph at the same time!

Poached Eggs with Dijon Dill Sauce, for 2

This is something I invented myself last Saturday morning while I was trying to figure out what to make for breakfast.

Ingredients:
2 slices of toasted Ciabatta bread, 1.5-2″ thick.
2 slices of honey ham
1/2 C. shredded, steamed chard
2 eggs, poached

For sauce:
1/2 TB of butter
1/4 tsp of flour
1/3 C of half and half
1/4 tsp garlic powder
1/4 tsp honey dijon mustard
A bit of dill, around 1/8 tsp, just a few gentle shakes of the spice jar
Salt and pepper

Directions:
Toast the bread, top with the ham, and put in a 250 degree oven to keep warm. Prepare the chard by removing the stems and center vein and slicing into ribbons. To steam, put in a pot with 1/2″ of water and cook until the chard is bright green, around 5 minutes. Put aside.
Poach the eggs. Fill a pot with water, enough so that the cracked eggs will be completely submerged. Add 1 TB of white vinegar to the water. Bring to a boil. While you are waiting for the water to boil, make the sauce (recipe below). Crack the eggs into the boiling water. Reduce the heat to medium and cover. Cook for 2-5 minutes, depending on how well done you like your eggs. I usually cook mine for about 3 minutes, and I like them slightly runny.

Sauce:
Melt the butter in a small saucepan. Once melted, add the flour and stir to combine. Add the half and half and stir again until slightly reduced. Add the garlic powder, dill, and a little bit of pepper. Turn off the heat and add the mustard, stirring until completely combined. Taste and add salt if needed.

To assemble:
Take the bread and ham out of the oven and plate. Divide the chard evenly onto both slices, top with the poached eggs and the sauce, and enjoy!