Recipe: Basil Pesto with Walnuts

17 Jul

Summer is in full swing, and as such basil is everywhere. Yes, you can grow herbs at any time of year, really, but right now is when they start propagating out of control. I bought a bunch of basil as big as my head for $2 at one of my local Farmer’s Markets, and aside from the fact that I couldn’t stop smelling it (smells amaaaazing) I was immediately seized with panic.

What the hell was I going to make with all of that basil? I only have so many tomatoes! When I thought, duh. I’ll make some pesto! I had never made homemade pesto, because I thought I wasn’t a huge fan. I’m normally a tomato sauce gal. I intended my very first batch for a potato-pesto pizza (just as amazing as it sounds) and when the pesto was done I was in shock. Who knew homemade pesto could be so amazing? It didn’t taste anything like the drab pestos I’d previously been accustomed to. This was fresh, garlicy-sweet, with a slight bite. Absolutely brilliant. I immediately slathered some on toast, and while I ate thought “I’m totally making this for my next blog”.

I know that nearly everyone knows how to make pesto, and that this recipe won’t really be a revelation to anyone. I just wanted to share my enthusiasm, and to let you know that if you have never made pesto from scratch, now is the perfect time to start.

Pesto, makes about 1 C. Recipe from Simply Recipes.com.

1 C basil leaves, packed

1/4 C parmesean cheese

1/4 C olive oil

2.5 TB walnuts (You can use pine nuts if you want).

1.5 garlic cloves, sliced.

salt and pepper to taste

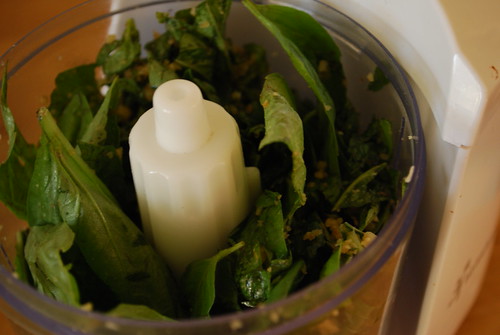
You will need a food processor or a blender. I have an itsy-bitsy Toastmaster Chopster. It’s a mini food processor, not very powerful, but perfect for pesto because it doesn’t liquefy the ingredients.

Put the walnuts in the food processor and pulse a few times until they are crumbly.

Grab your basil and pack a cup full of basil leaves. No stems, and make sure you pack tightly!

Chop the garlic very coarsely, add it to the walnuts in the food processor and pulse them together.

Add the basil and pulse lightly until the leaves have broken up, scraping down the sides of the processor is necessary.

Add the olive oil a little at a time, pulsing between each addition. When you are done, the mixture should be cohesive but still granular.

Add the cheese and pulse to combine.

Now taste and add add salt and pepper as you like.

You can add the pesto to anything, use it for pastas or pizza, or just slather it on a slice of french bread like me.

Yum.

❤ Stef

Recipe: Coffee Can Vanilla Custard Ice Cream

11 Jul

I love homemade ice cream.

I also love to make ice cream, because I can do whatever I want, however I want, whenever I want. Peach ice cream? You got it! Chocolate custard? You betcha! Caramel swirl with m&ms, chocolate chips and peanuts? Why not? Dooooo iiiiiit.

The only problem is that I don’t have an ice cream maker. I used to, but it was a cheapie one from Target and one day a few years ago it stopped working. I had it running for nearly eight hours before I realized that the little paddle inside wasn’t spinning, so the ice cream couldn’t become ice cream, just liquidy mess. It sucked.

I hadn’t bothered to make ice cream since, because I thought you needed a proper ice cream freezer and I don’t have one. It turns out, you don’t need a freezer at all, just some ice and salt and ingenuity. These things I have in spades, which is why tonight I will have vanilla custard ice cream for dessert, and you can, too.

Recipe from Fanny at Chez Panisse by Alice Waters.

2 egg yolks

1/2 C sugar

1/2 C milk

3 drops vanilla extract

lemon zest

1/2 C whipping cream

First you will need one very large jar and one small. The reason the recipe is called “coffee can” ice cream is because you are meant to use two coffee cans, but I don’t buy my coffee in cans. Jars or tupperware will work just as well. The small jar will hold the ice cream ingredients, and it needs to have a very tight seal. The large jar will hold the small jar, the ice, and the salt.

Separate the egg yolk from the white and put the yolk in a small saucepan.

Add the sugar and whisk. Heat the milk (I used the microwave) until hot, but don’t let it boil. Slowly add the milk (about 1-2 TB at a time) to the yolk and sugar until completely combined.

Heat gently, stirring all the time. You want to thicken the mixture slightly, either until it reaches 170˚ or it coats the back of a metal spoon and you are able to draw a line through it with your finger.

You are supposed to strain it at this point, but I didn’t. This did not negatively affect the finished product, but hey. If it makes you feel better, strain your custard. I don’t like to follow directions.

Add the vanilla and the lemon zest and put the mixture into the fridge and allow it to cool. Once cool, stir in the cream and put the mixture in the little jar. If you wanted to add fruit or chocolate pieces to your ice cream, this would be the time to do it. Put a piece of saran wrap between the jar and the lid.

Put the jar in the freezer overnight, until it is frozen half solid.

Take it out and pack it in the larger tupperware with ice and salt, and shake for about 20 minutes.

If the ice cream is too soft for your liking, you can put it back in the freezer until it is more hard.

Serve!

Add chocolate fudge if you like.

Hooray! Ice cream without a crazy ice cream freezer/maker/mabob.

❤ Stef

Ice cream postponed!

10 Jul

I’m making totally delicious ice cream for you all, but it is taking a bit longer to freeze than I thought it would. As a result, I’m running out of daylight and won’t be able to post finished pictures and instructions until tomorrow.

Until then,

❤ Stef

Recipe: Garlic Aioli

3 Jul

One of my favorite cookbooks is called Fanny at Chez Panisse, by Alice Waters. It is actually the only Alice Waters cookbook that I own, and it was my introduction to her as a chef/food activist. The book was originally given to my little sister Jesslyn for Christmas a few years ago, but I ended up using it more than she did. The first roast chicken recipe I ever made was from this cookbook. I made it with roast potatoes and this aioli.

Last week I was at my mother’s house and I went through her bookshelves and grabbed back my childhood cookbooks. Fanny at Chez Panisse was one of them, and I thought I would share this recipe with you because it has so many good memories for me. Aside from that, it is totally delicious. I use it to dip roast potatoes and chicken into, but it would also make an awesome sandwich spread. In fact, tonight I made roast chicken and potatoes with this aioli on the side, and I plan on making sandwiches with the leftovers tommorrow. Mmmm.

Ingredients:

1 egg, yolk and white separated.

1 C olive oil

1 clove of garlic, or more if you prefer. I used around 3.

Salt and pepper

1/2 tsp lemon

First, smush up the garlic with the flat of a knife and chop it very finely. Add it to a bowl with just the egg yolk.

Get your cup of olive oil, and make sure you have it in a container with a spout.

Slowly whisk the olive oil into the yolk, about 1 TB at a time, making sure to fully incorporate the oil into the yolk each time.

Once you have added about half of the oil, add a splash of water, whisk to combine, and continue adding the oil. At this point you can add a little bit more oil each time because the mix will be generally cohesive.

Once you have added all of the oil, add the lemon and salt and pepper to taste.

Serve with whatever you feel like! It is best eaten the same day, but it will keep in the fridge for a few days, too.

❤ Stef

Recipe: Clafouti Cutie!

26 Jun

A clafouti is a French custard/cake-y dessert baked with fresh fruit. According Wikipedia (which is my handbook for life) the traditional fruit is cherries, though I decided to use plums because my mom has a tree and I am inundated with them. Santa rosa plums are taking over my LIFE!

This recipe is a bit like the ricotta cake I posted last week. It is certainly just as easy, but it has a different texture. It isn’t as cheesecake-y, more cake-y, plus it has all of that awesome fresh fruit. If you thought I was crazy calling ricotta cake breakfast material, you must accept that this clafouti definitely qualifies. It has fruit! FRUIT!

Oh, and as a side note, I’m visiting Boston for a few day this coming Monday and I would love food/sight/must see suggestions, if anyone’s got em!

Recipe adapted from Almost Vegetarian by Diana Shaw.

Ingredients:

1/2 C milk

1/2 C ricotta cheese

2 eggs

1/2 C sugar

1/2 C flour

1 tsp vanilla

2 C fresh fruit, your choice. Cherries, blueberries and plums are all great options!

Set oven to 425 degrees.

Mix together the milk, ricotta, eggs, sugar, flour, and vanilla using a blender, food processor or handy-dandy immersion blender. (Have a mentioned how much I love my new immersion blender? Because I LOVE IT!)

Chop up your chosen fruits.

Spread the fruit onto the bottom of a pie plate or vaguely pie plate-shaped baking tin.

Pour the custard-y batter on the top of the fruit.

Bake until puffy and delicious looking, 30 to 35 minutes.

You can eat the clafouti warm, but it is much, much easier to cut when it is completely cold.

Eat for dessert, breakfast, or snacktime. Especially snacktime.

❤ Stef

Recipe: Ricotta Cake

19 Jun

Original recipe by Mario Batali (I modified ingredients slightly).

I had no idea that ricotta cake existed, but apparently it does, because here it is! This was extremely easy to make. You basically just mix everything together and throw it into the oven. BAM! (Sorry, Emeril.)

You’re supposed to use a cake pan, but I used ramekins because they are more fun. These are excellent served with fresh fruit, either for dessert or (gasp!) breakfast. It’s got eggs and cheese. It’s totally breakfast material.

Please excuse my wonky measurements. I halved the recipe, and dividing 3/4 by 2 is more difficult than it looks.

Olive oil, for greasing the ramekins

1/2 C + 6 TB ricotta cheese

1/3 C sugar

zest of 1 orange

1.5 eggs, separated (this is the most annoying part.)

Combine the ricotta, sugar, orange zest and egg yolks.

Mix until combined. Add half of the egg whites to the mix and stir, then add the other half and stir.

Grease the ramekins (my batter fit into 3).

Divide the batter into the ramekins, and put in a 300 degree oven for 30 minutes, until the tops are light golden brown.

And that’s all!

Except for the eating part, of course. That is is best part of the whole baking experience!

Oh, yes, ricotta cake. You make me happy.

❤ Stef

Recipe: Blue Cheese Stuffed Steak and Caprese Salad

13 Jun

My boyfriend hates steak. He eats meat. He eats ground beef, pork chops, sausage and pretty much any other type of meat known to man, but will not touch steak. I’m not sure why. He probably doesn’t even know why.  In any case, I think he’s nuts and anytime I want a steak I have to concoct new and exciting ways to eat it. That’s why I decided to take a sirloin steak my mother gave me and fillet it and stuff it with onions and blue cheese. The salad was thrown in as an afterthought for two reasons. One, you can’t have a meal with just meat. It’s just not right. Two, I have a bunch of basil and tomatoes that need eating.

I have to warn you that the recipes that follow don’t have any specific measurements. You really don’t need them for this, it’s more of a “stuff steak with as much blue cheese as you like” type of deal.

Stuffed Steak with Blue Cheese and Red Onion

1 sirloin steak, about 1/2 lb. You can use more if you like. You could also use a meat other than sirloin if you wish. Flank would work well.

Blue cheese. I used a few slices, less than 3 oz

Red onion, sliced thin. About 1/2 of a small onion, or to taste.

Steak seasoning

Salt and pepper

Tools:

Pan that can be used both on the  stove top and in the oven.

Butcher’s twine.

Grab your steak.

Using a super sharp knife, butterfly the steak by slicing it in half width wise and opening it up.

Slice your red onion into very thin slices.

Saute the onion with a bit of olive oil for about a minute or two. This will make them sweeter.

Slice the blue cheese.

Layer the blue cheese on the steak.

Put the sauteed onions on top.

Season with salt and pepper.

Now roll the steak up, and secure every inch or so with butcher’s twine. Season on all sides with steak seasoning. I always use Old Bay.

A note about butcher’s twine-I didn’t have any, so I used sewing thread instead. It worked just fine, but you should probably buy yourself some butcher’s twine anyway. I keep meaning to pick some up, but I always forget. Plus, you really have no idea if your sewing thread with hold in the high heat you will be cooking the steak in.

Using the pan that you sauteed the onions in (make sure it is oven-safe!) sear the steak roll on all sides so that it has a nice crust.

Once it has been seared, put the whole pan in a 400˚ oven for 15 minutes. I like my steak rare to medium rare, so 15 minutes was perfect. Leave it in 5-10 minutes longer if you prefer yours medium to well done.

Remove from the oven, and let it sit for at least 10 minutes. This will allow the juices to redistribute. Plus, keep in mind that the steak will continue to cook during this period, raising in temperature up to 10˚.

While you wait for the steak, make the salad.

Caprese Salad

1 medium-large tomato

Fresh mozzarella

Handful of fresh basil

Olive oil

Balsamic vinegar

Dried oregano

Garlic powder

Salt and pepper

Cut the tomato and the mozzarella into large cubes.

Grab a handful of basil and cut into strips.

Put all three ingredients into a bowl together.

Add the salt and pepper, garlic powder, dried oregano, and a splash of olive oil and a smaller splash of balsamic. Eyeball it. Use less than you think you need at first. You can always add, but removing ingredients is difficult. Just like mascara, or eyeliner. (I apologize to my male audience members, who may or may not have any idea of what I’m talking about!) Mix together.

Once the salad is done (and 10 minutes have elapsed) cut the steak into slices.

Serve with the salad.

Ok, now, when you eat the steak, but a piece of steak in your mouth, followed immediately by a piece of tomato.

Mmmmmmmmmm.

❤ Stef

Today I Am Lazy.

12 Jun

I’ll admit it.

Today was an exceptionally lazy day for me, and coupled with recipe-block (yes, I just made that up. I’ve got a mind like a steel trap, I do!) this means that I don’t have a recipe to share with you this evening.  I will definitely have a post by tomorrow afternoon, however. I’m brewing a little something up in my mind, something that involves-

Steak

Tomatoes

Onion

Cheese (blue or gorgonzola, can’t decide)

and possibly Cous cous. Or Quinoa.

I know it will be delicious, I just don’t quite know what “it” is yet.

❤ Stef

How To: Make the Perfect Cup of Coffee

9 Jun

I started drinking coffee at age 12. I started with the Starbucks pre-mixed frappuccino beverages you get in the grocery store. Then I moved to the real Starbucks frappuccinos, mocha at first, then the coffee flavor. Soon the frappuchinos were too sweet, so I started ordering caramel macchiatos. I stayed steady on those for a good year or two, until my boyfriend introduced me to Peet’s. I started drinking a macchiato with caramel and two packets of sugar. Then I stopped putting in the sugar, and eventually moved on to lattes. I now drink drip coffee almost exclusively. I like it extremely strong and dark, with lots of cream and sugar. It has to be very dark coffee, though! Anything less, once the addition of cream and sugar, tastes weak to me.

My cafe of choice has also changed–I absolutely hate Starbucks. I can appreciate what they have done for the coffee business, and cafe culture, but their coffee is just terrible. Sorry Starbucks!

I was making my drip coffee with a regular machine, sometimes with a french press, until I first went to a coffee shop called Philz here in San Francisco.

Oh. My. Jesus.

Philz makes its coffee using drip cones exclusively. They also roast all of their own beans, and I have to tell you that one taste of that coffee and I was hooked. In my opinion, a ceramic drip cone creates coffee that is better than any espresso.

First, a few pointers.

1. Always grind your own beans. You can easily get a grinder for $10, probably less.

2. Use filtered water.

3. Use 3 TB of coffee to 8 oz of water.

4. Use beans that are dark and shiny in appearance. I don’t think there is anything particularly documented about this, but that is how I choose beans and my coffee is always awesome!

You will need:

A teapot.

Your mug of choice.

A ceramic coffee dripper (mine is from Beehouse).

Coffee filters.

Cream and sugar.

Coffee beans!

Set a pot of water to boil. You should boil 3 times the amount of water that you need. While you wait for the coffee to boil, grab a mug and put your desired amount of cream and sugar in it. Microwave it for about 30 – 45 seconds.

Grind your beans. For this style of brewing, the beans should be a medium grind, about the texture of coarse sand.

Put the ground beans into a coffee filter, and put it all in the cone.

Set the cone onto the mug.

Pour 8 oz of water into a measuring cup, preferably a glass pyrex one.

Pour just enough water onto the ground to allow them to expand, and stir the grounds. Then slowly add the rest of the water.

Stir the grounds gently as the coffee drips. You don’t have to stir consistently, just a few times to make sure the grounds and the water are mixed.

Stir your finished coffee, and enjoy!

I guarantee that this will be the best cup of coffee you have ever had! I should know; I’m obsessed!

❤ Stef

Recipe: Lemon Thyme Donuts

5 Jun

Today is National Doughnut Day, which is pretty awesome. Every year I find out about more semi-obscure holidays extolling the virtues of all kinds of foods. Examples: National Popcorn Day, National Pie Day, National Candied Orange Peel Day, and National Cherries Jubilee Day. You should go look around on that website. There is a celebration nearly everyday.

So in honor of today’s holiday, I decided to make some donuts. Makes sense, yes? Though I do wonder, how does one officially spell “donut”, anyway? I see it spelled “donut” and also “doughnut” and am very confused. Which is correct? Does it matter? Is one more popular than the other? It seems to simply vary from one shop to the next, without rhyme or reason. I’ve elected to use “donut” because there are fewer letters. Also, the Donut Wheel, the best donut shop ever, utilizes that spelling. I bow to them as the donut gurus.

Donuts with Lemon-Thyme Glaze

Donut recipe from Secret Donut Recipe; glaze modified from their vanilla glaze recipe.

Donuts:

1 C warm milk

1 pkg yeast

2 C flour

1/2 C warm mashed potato

1/2 tsp salt

1/4 C sugar

2 TB oil

Yes, this recipe uses potato. At first I thought that potato was a very strange ingredient, but I decided to give it a chance because I love potato bread so much. It was not a mistake. These donuts are amazing! Very easy to handle and results in a fluffy and moist donut. Give the potato a chance!

So first, what you will want to do is prepare the potato. Prick it all over with a fork, and put it in the microwave to cook. If your microwave has a baked potato setting, use that. Otherwise, microwave for a minute or two at a time and check it . The potato should be soft to the touch. Let the potato cool and warm the cup of milk. Add the yeast to the milk along with a pinch of sugar and allow to sit for 5 minutes. Cut the potato in half and scoop out the insides. Add the flour, sugar, and salt.

Mix together and add the milk and yeast, and 2 TB of oil. Mix with your hands (or using a stand mixer, but I don’t have one of those) until the dough forms a cohesive ball. The dough will be a little sticky.

Spread a surface with flour, turn the dough onto the surface and knead a few times.

Spread to 1/4 – 1/2″ thick. I did mine about 1/4″ using just my hands and a cylindrical rum bottle. I don’t have a rolling pin, either!

Cut donut shapes using either a donut cutter (which I also do not have) or circular household objects. I used a drinking glass for the large circle and a bud vase for the small circle. I’m resourceful!

Let the donuts rise for 10 minutes. While you wait, fill a cast iron pan 1/2″ with oil and heat. I heated mine at about medium heat for 10 minutes and the oil temperature was perfect. During this time, you should also make the glaze.

Lemon-Thyme Glaze

2 TB warm milk

1/2 tsp butter, just a little shave off of a stick

1 C powdered sugar

1 tsp vanilla extract

1 tsp lemon zest

1/2 tsp dried thyme

Warm the milk and the butter. Add to the powdered sugar and mix. Add the lemon zest, vanilla, and thyme. Mix together. Feel fee to leave out the lemon and thyme if you would prefer a simple vanilla glaze.

Cook the donuts until golden brown on each side. This only takes a few minutes, so be sure to watch carefully.

Let cool on a plate lined with paper towels. When the donuts have cooled, dip them into the glaze to cover and put them on a plate to allow the glaze to set.

Look at that deep fried glaze-y shine. Perfection! And yes, they absolutely do taste as delicious as they look!

Now excuse me, I have a half dozen donuts to eat.

❤ Stef